
Design your sign-in and sign-up pages: 14 layouts with your image and text
Give your academy’s sign-in and registration pages your own look: pick one of 14 layouts, add a photo, your logo and a welcome message in English and Spanish, preview it on desktop and mobile, and publish.
On this page
In this topic 7
- Design your student area: styles, logo, colors, home and menu
- Build and publish your website with the Website Builder
- Connect your own domain (CNAME or A record) with automatic HTTPS
- SEO and Google Search Console: sitemap, robots.txt and site verification
- Design your sign-in and sign-up pages: 14 layouts with your image and text
- FAQs for your students and visitors: help center, order and FAQ rich results
- WordPress plugin: sell your courses and add single sign-on
In this guide
- Which pages you can design and which plan you need.
- Choose a layout and add your image, logo and text.
- Preview on desktop and mobile, save a draft and publish.
Before you start
- You design two pages: Sign in (
/login) and Register (/student/register) on your academy's address or custom domain. - Anyone can open the editor and preview designs. Saving and publishing need the full Website Builder, included in the Professional and Institutional plans.
- Until you publish, students see the Standard design: a centered card with your logo.
1. Open Login and registration
-
Go to the Website Builder
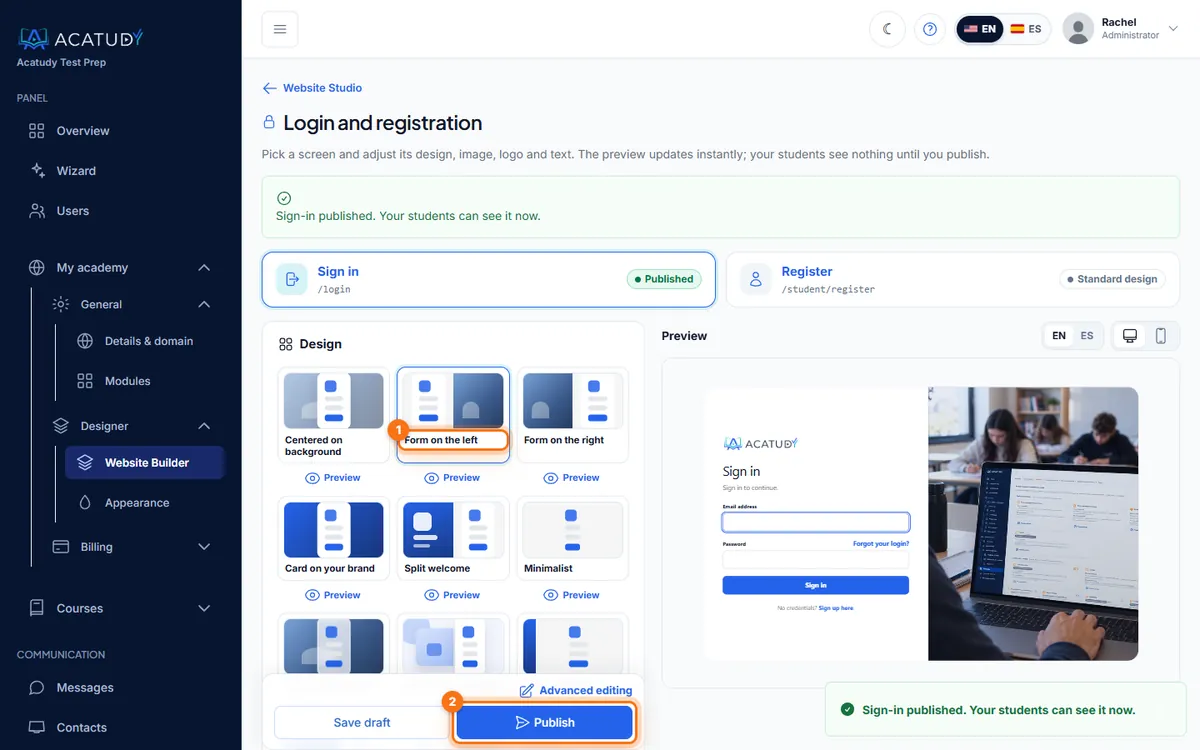
Open My academy → Designer → Website Builder. In the Login and registration section, click the Sign in or Register card.
-
Pick the screen
At the top, switch between Sign in and Register. Each card shows whether it uses the standard design or a published one.
2. Choose a layout
The Design panel has 14 layouts. Click one to see it in the preview; Preview under each card opens it full size with a sample image.
| Group | Layouts |
|---|---|
| Full-screen image | Centered on background, Glass over image, Moving gradient |
| Image and form side by side | Form on the left, Form on the right, Split welcome, 60/40 collage |
| Brand-colored | Card on your brand, Color side band, App style |
| Message-led | With a featured quote, With a benefits list, Card with illustration |
| Simple | Minimalist |
You can also apply a layout from the gallery Sign-in and sign-up designs on the Website Builder home: choose whether it applies to both pages or only one (Apply to) and click Use this design. It goes to your draft.
3. Add your image, logo and text
- Image: upload one, pick it from your library or paste a URL. Set the focal point (9 positions), zoom, how much to darken the background so text stays readable, and where the image goes (automatic, full background or side).
- Logo: show or hide it, its size and alignment, and a background plate if your logo needs contrast.
- Text: title, subtitle, welcome message, button text, a quote with its author or up to 6 benefits, depending on the layout. Fill in English and Spanish: each student sees their language.
- Options: show Continue with Google, the Sign up or Log in link, the Forgot your login? link and, on registration, the marketing-emails checkbox.
Tip
Use a real photo of your classes or your team, at least 1600 px wide. For a US test prep academy, a short benefits list ("Full-length timed SAT practice", "Score report after every exam") works better than a long paragraph.
4. Preview, save and publish
-
Check both languages and both screens
Above the preview, switch EN / ES and Desktop / Mobile. The preview updates as you type.
-
Save draft or Publish
Save draft keeps your changes without showing them to students. Publish makes the design live on your sign-in or registration page.
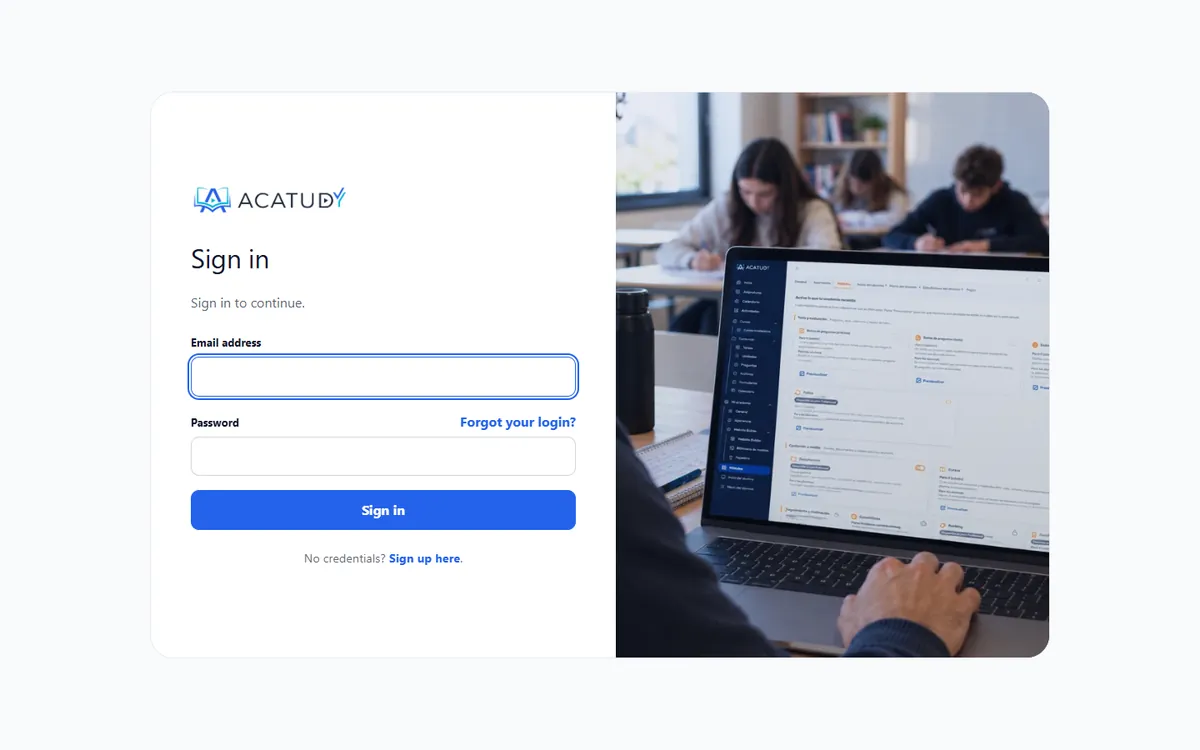
The published sign-in page, as students see it.
Need something the panel doesn't offer, such as your own colors for a specific element? Click Advanced editing (above Save draft) to edit the page in the full Website Builder: see Build and publish your website.
Frequently asked questions
Does the design apply to the "forgot password" page?
No. Only the sign-in and registration pages use these layouts.
Why don't I see "Continue with Google"?
The button only appears once you've set up your own Google credentials. See Sign in with Google.
I moved to a plan without the full Website Builder. What happens?
The published design stays live. You just can't save or publish changes until you upgrade.
Follow this guide in your own academy
Create it free in a couple of minutes and keep your admin panel open next to this guide.
Open a ticket from Help → Support in your panel: we reply within 24–48 h depending on your plan.