
Certificates: 10 designs, QR verification and a permanent record
Award a PDF certificate when a student passes a final assignment, completes a subject or you issue it by hand. Choose from 10 classic and youthful designs in your brand colors; every certificate has a QR code anyone can verify, even years after your academy closes.
On this page
In this guide
- The ways a student can earn a certificate.
- Choose one of 10 designs and your colors and check the live preview.
- Customize the text and duration in hours.
- How students download it and how anyone can verify it with its QR code.
- Revoking a certificate and what happens if your academy closes.
Before you start
- Certificates are included in the Professional and Institutional plans. Make sure the Certificates module is on in My academy → General → Modules.
- Each certificate belongs to a subject: one criterion per subject.
1. Choose how the certificate is earned
Open the subject (Courses → Subjects → (your subject)) and go to the Certificate section. In Certificate criteria choose:
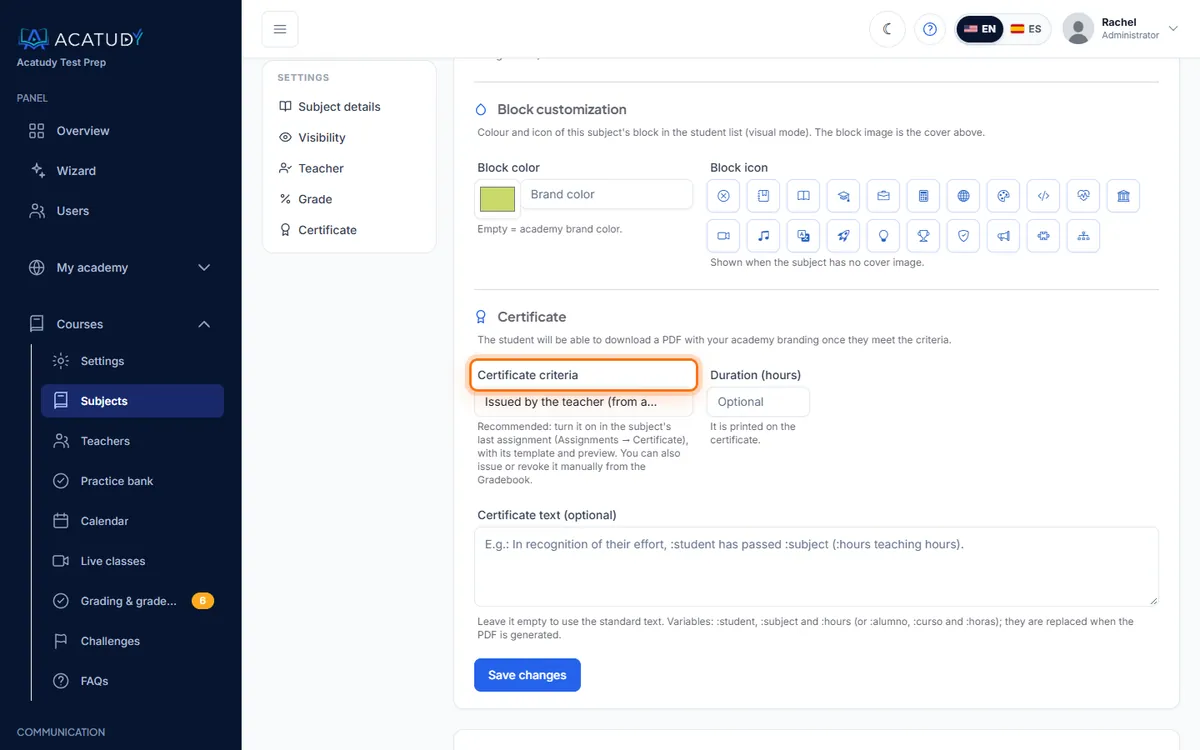
| Criterion | When it's issued | Good for |
|---|---|---|
| Disabled | Never | Test-prep drills |
| Complete the subject (100% of resources) | When the student completes every active resource | Self-paced courses, onboarding |
| Pass an assignment | When you grade the chosen assignment as passed | Capstone projects, portfolios |
| Issued manually | When an admin or the subject's teacher issues it from the Gradebook | Special cases, transfers |
In the same section, set Duration (hours) (e.g. 40) and, optionally, your own Certificate text (optional) (up to 500 characters). You can use the variables :student, :subject and :hours, e.g. "This certifies that :student has completed :hours hours of :subject with distinction."
2. Pick a template and your colors
Templates and colors are set on the assignment that issues the certificate. Open the final assignment in Courses → Assignments (visual mode) or the subject's Assignments tab (vertical mode) and turn on Issue a certificate when this assignment is passed:
-
Choose a design
Each card shows a thumbnail with your colors. You can see them all full size in Grading & gradebook → Certificates → Designs.
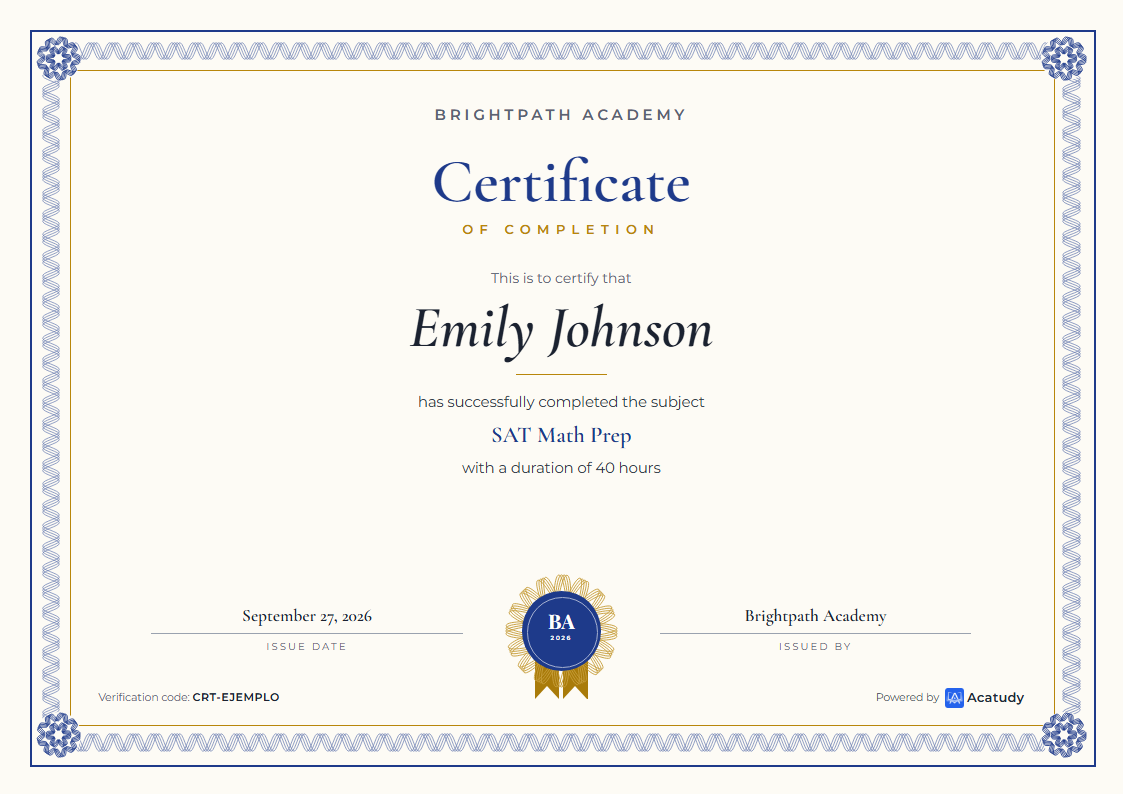
- Classic: Classic (thin double frame, serif title), Modern (side color band), Minimalist (no frame, one accent line) and Elegant (thick frame and a filled seal).
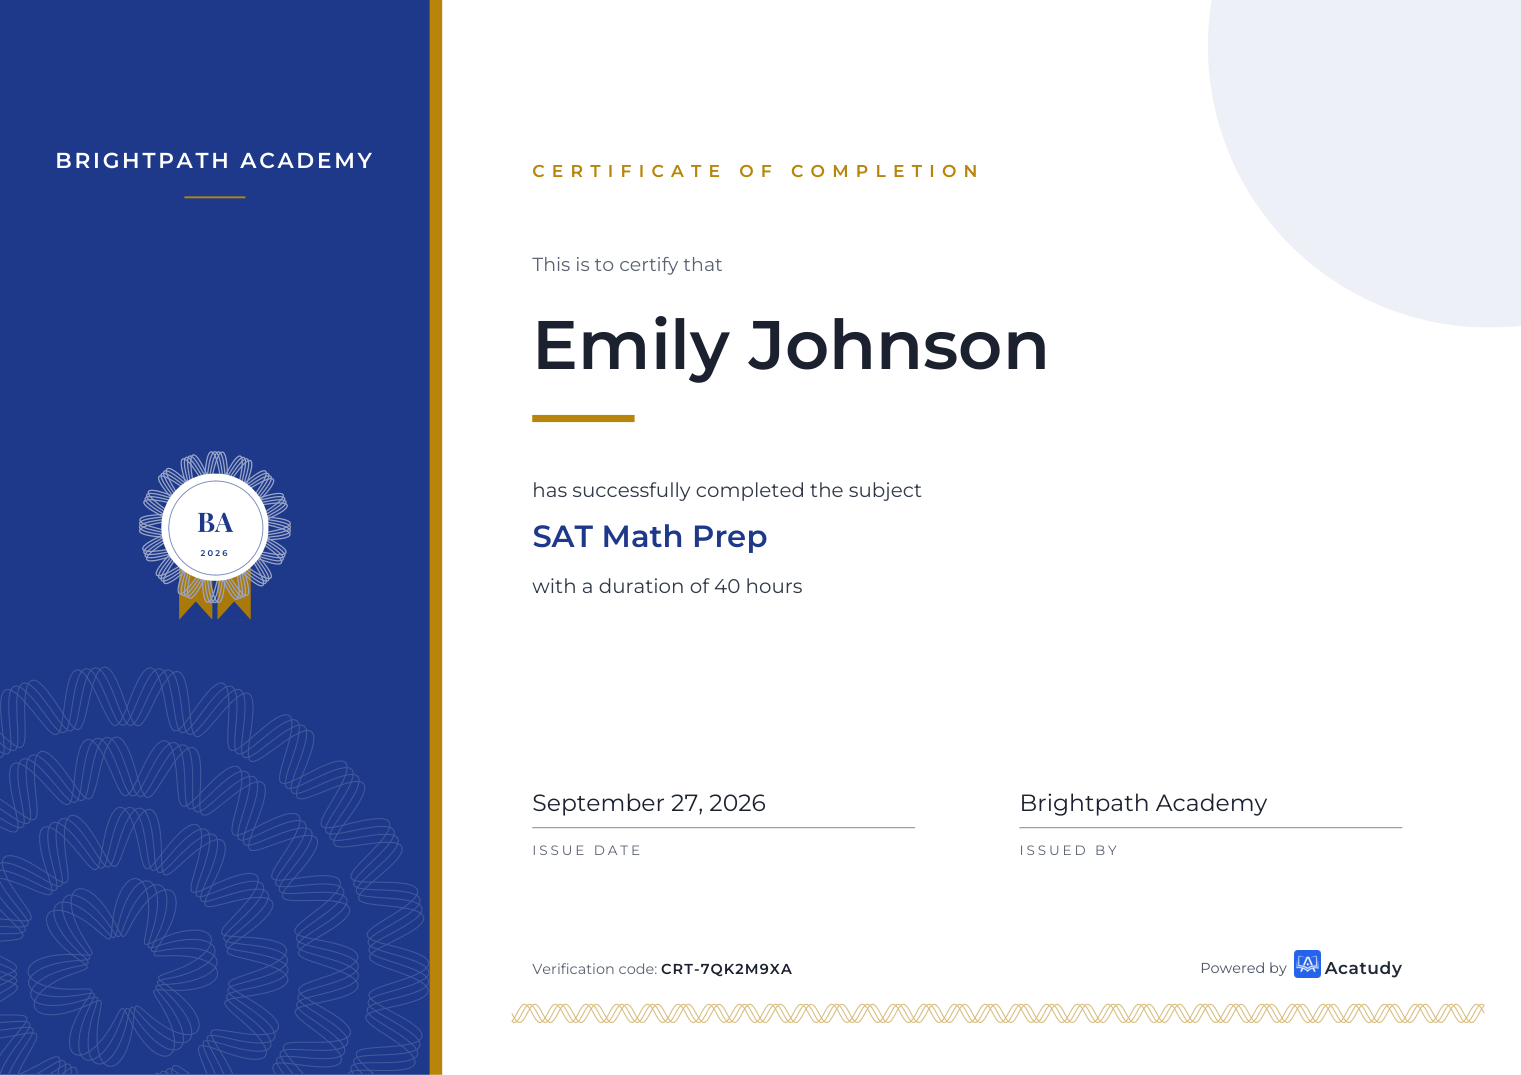
- Fresh and youthful: Blocks (geometric mosaic), Tech (dark background with neon circuit traces), Bold (bright colors and a sticker with the year), Gradient (diagonal gradient between your two colors), Badge (digital credential with a hexagonal badge) and Swiss (editorial grid with a huge name).
-
Set the main and accent colors
Pick a Main colour and an Accent color, e.g. navy
#1E3A8Aand gold#B8860B. Leave them empty to use your academy's brand colors. -
Check the preview
Click Preview to see the certificate with sample data before any student gets it. The real one carries the student's name, the subject and a verification code.
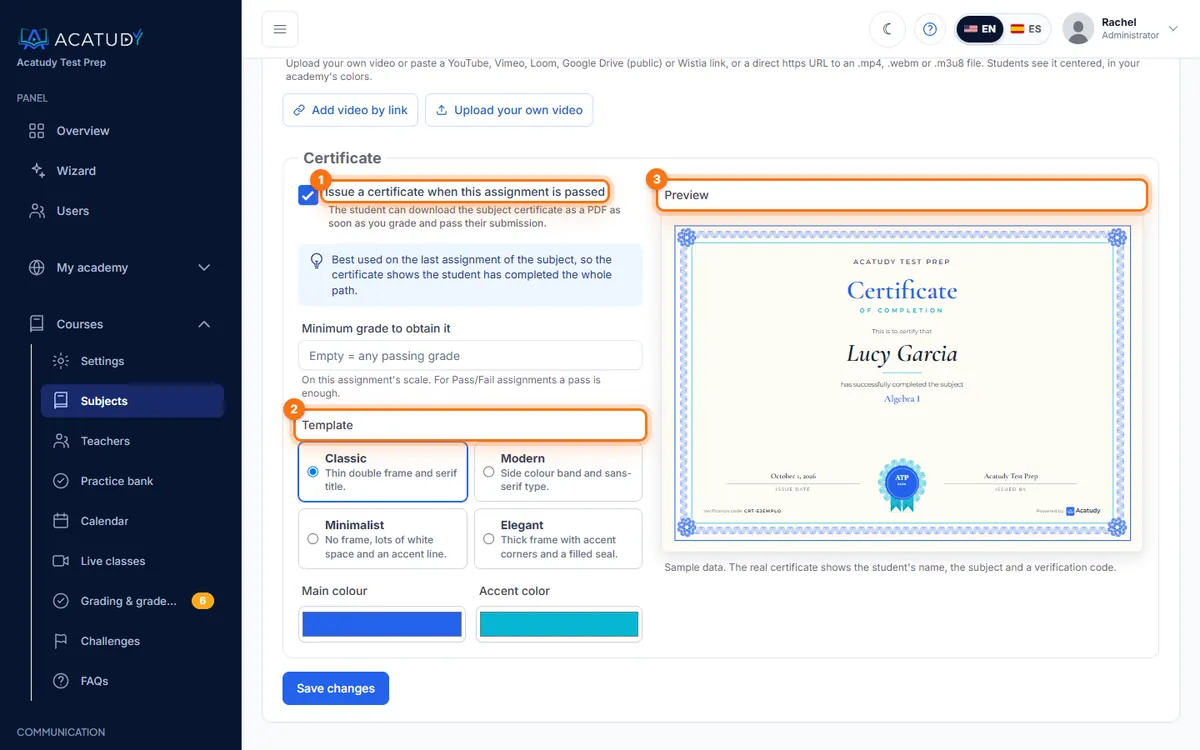
Certificate panel in an assignment: template, colors and preview. -
Set the minimum grade
Minimum grade to obtain it uses the assignment's own scale; leave it empty to accept any passing grade. For Pass/Fail assignments, a Pass is enough.
One criterion per subject
If the subject already issues a certificate with another criterion, turning it on in an assignment replaces it with that assignment. Use it on the last assignment of the subject so the certificate proves the student finished the whole path.
3. How students get it
As soon as the student meets the criterion, a download button appears in the subject. The certificate is a landscape PDF (US Letter for academies in the USA, A4 elsewhere; you can change it in Certificates → Settings) with your academy name, the student's name, the subject, the hours, the issue date, a unique 12-character code such as 7KQM-4XHT-9WPA and a QR code.
4. Verification, revoking and a permanent record
- Anyone can verify it: the QR code opens
acatudy.com/verify/<code>, a public page (no sign-in) that says whether the certificate is valid, revoked or not found, with the student, subject, academy and date. In Certificates → Settings you can show only the student's initials. - Only the academy admin revokes: in Grading & gradebook → Certificates, click Revoke and enter the reason (it appears on the verification page). Reactivate brings it back with the same code. Teachers can issue certificates but not revoke or reactivate them.
- If your academy closes, certificates are kept: before an academy is deleted, every valid certificate is copied to Acatudy's central archive. Its code and QR code keep working as a verifiable historical record, and each student can download their PDF from the verification page by entering the email it was issued to.
Frequently asked questions
Can I show my logo instead of Acatudy's?
The certificate is issued in your academy's name and colors. A small "Powered by Acatudy" mark appears at the bottom.
What happens to my students' certificates if I close my academy?
They stay verifiable. Acatudy keeps a minimal record of each valid certificate (code, student, subject, academy and dates) and the PDF, so students and employers can still check it years later.
Can I re-issue a certificate with new colors?
Colors and template apply to certificates generated from then on. Check the preview before your first students finish.
Follow this guide in your own academy
Create it free in a couple of minutes and keep your admin panel open next to this guide.
Open a ticket from Help → Support in your panel: we reply within 24–48 h depending on your plan.